January 10, 2021
How to start using Unity UI Builder
This article is probably obsolete, because it was written back in 2021
Unity UI Builder is a new and alternative way of creating user interfaces in Unity. There are two main file types: UXML and USS.
The UXML-files, are XML-like files that are used to design the interface. To support the UXML files, you also have USS files, which are used to style the interface. You can think of UXML as the framework for a building, and USS as adding details to the framework.
If you are familiar with web development, the UXML-files are comparable to HTML-files, and the USS-files are comparable to CSS-files.
How to install UI Builder
The new UI Builder is available in Unity 2019.2 and later, so make sure you have a valid version of Unity, to begin with. Then, you need to install the UI Builder and UI Toolkit packages using the package manager. Both of them are still in preview, so make sure you have preview packages enabled. Otherwise. you will not see them.
If you can not find the packages from the Package Manager window, you can still add them manually to your manifest.json file (located in <Project location>/Packages/manifest.json) by adding these lines to it:
"com.unity.ui": "1.0.0-preview.13",
"com.unity.ui.builder": "1.0.0-preview.11",
Creating a UI Document
A UI Document is a UXML-file, that contains the layout of your design, such as 2 buttons, 1 label, and a scroll view with some text. You can create a UI Document by right-clicking in your project view, select Create > UI Toolkit > UI Document
After creating the UI Document and naming it whatever you want you open the UI Document by double-clicking it, and a window called UI Builder should open.
UI Builder window
The UI Builder is the main window that will be used for designing your interface (unless you want to write code)
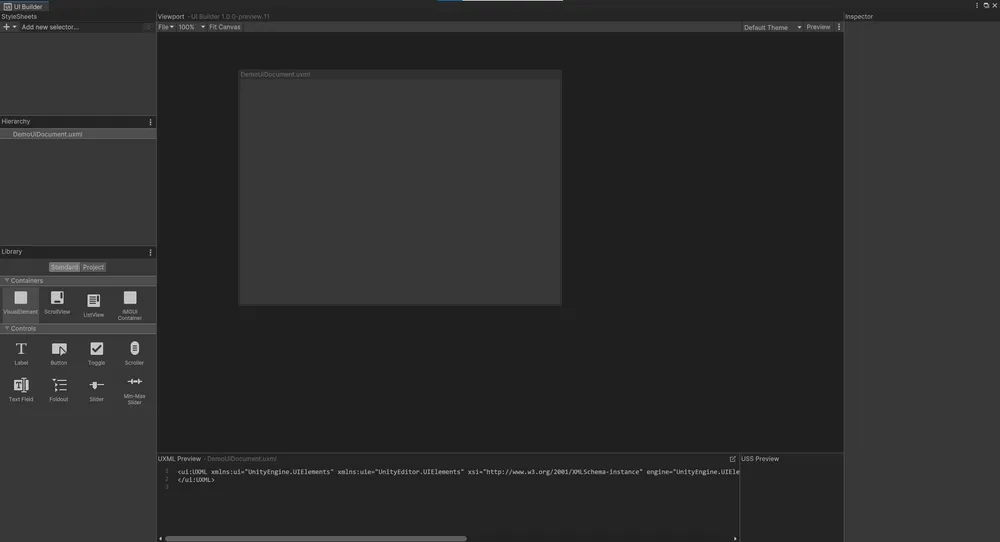
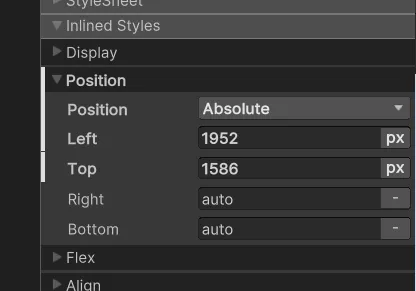
On the bottom left are the elements that are available. You can drag them into either the viewport or the hierarchy. You will notice that the elements will be all the way at the top, and will be the full width of the viewport. If you want to be able to move and resize your objects, you can select the object, go to the Position toggle, and set it to Absolute, instead of Relative. Now you can move it around with your mouse or by changing the Left and Top properties of the position.
Now you can go ahead, and craft your interface by dragging different elements into the viewport and positioning them nicely.
Here are some tips for designing your UI:
- If you are using Position: Relative, you should also take a look at the Margin & Padding section in the inspector. That will give the elements a little breathing space so your interface doesn’t look so crowded.
- You can change the text, text size, text color, etc. of an element in the Text section in the inspector.
- You can change the background color of an element in the Background section in the inspector.
Showing the UI in your game view
Now that you’ve finished the layout for your interface, you can put it into your game window. It doesn’t have to be perfect yet, as you can always modify it. There is also no USS, or styling applied yet so it probably doesn’t look pretty.
Now, go into your hierarchy inside of Unity (not inside of the UI Builder window!), right click and add a UI Document GameObject to the scene (UI Toolkit > UI Document). Then add the previously generated UI Document file to the Source Asset field under the UI Document component in the inspector window.
The game view will not show any UI yet. You will have to hit play once for the UI Document component to start working. After doing that once you don’t need to do it anymore.
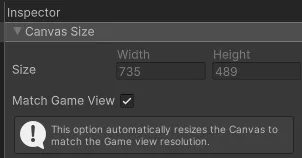
Sometimes you may notice that the game view and the viewport inside of the UI Builder window don’t quite match each other. You can fix that by going back into the UI Builder window. Select the UI Document in the hierarchy, and set Match Game View to on.